Low Sugar Cherry Jam Recipe
This post may contain affiliate links, which means that I may receive a commission if you make a purchase using these links. As an Amazon Associate I earn from qualifying purchases.
This chunky, low sugar cherry jam is delicious slathered on toasted homemade bread, swirled in yogurt, or drizzled over ice cream. Less sugar lets the natural fruit flavor shine.

Tips for Making Cherry Jam
Fresh cherries are the first stone fruit of the season. Cherries are divided into two main categories, sweet cherries and tart or sour cherries. Both types will work for making this low sugar cherry jam, but you may want to add more sweetener if you are using tart cherries.
Early varieties of sweet cherries begin appearing in our grocery stores in starting in June. These come from warmer climates where the trees bloom and the fruit ripens earlier than our local cherries.
Tart cherries are not usually found in the grocery store because they don’t ship well and tend to deteriorate quickly after harvesting. Sour cherries are what I will find at our local farmers’ markets because this is the type that will grow in our cold climate without danger of late spring frosts killing the blossoms.
Selecting Cherries
Choose cherries that are in season with shiny skins, good color, and green stems. The fruit should feel firm, with no soft spots, wrinkles, or blemishes.
If you are harvesting your own cherries, pick mature fruit that is fully colored for the variety. Cherries are ripe when the stems pull away easily from the tree. Grip the stems and twist to separate it from the branch. Leave the stems on the fruit, so it will stay fresh longer.
How to Store Cherries
Store fresh cherries in the refrigerator to keep the fruit cool. Sweet cherries will last up to two weeks before they begin getting soft. However, tart or sour cherries won’t last as long and should be made into jam within several days, or washed and frozen for later.
To freeze cherries, wash well under fresh clean water, air dry on a kitchen towel, place in freezer containers, and store in the freezer for up to 12 months. If you plan on making jam later out of frozen cherries, weigh the cherries with a kitchen scale before freezing so you have the correct amount for your recipe.
Pomona’s Universal Pectin
This recipe uses Pomona’s Universal Pectin instead of your regular boxed pectin. Pomona’s is a citrus pectin that uses calcium powder to gel instead of lots of sugar.
The benefit is you can use less sugar or honey allowing the natural fruit flavor shines in your jellies and jams rather than the sweetness of the sugar. The recommended sweetener range for 4 cups of crushed fruit is 3/4 to 2 cups of sugar, or 1/2 to 1 cup honey.
You can find Pomona’s Universal Pectin in stores with the other canning supplies or online. The package comes with full instructions and recipes for making jams, jellies, and preserves.
Don’t Have a Water Bath Canner?
No problem! You can use a large sauce pot to process the jars as long as the pot is tall enough to cover the tops of the jars by a few inches, plus two or more inches of space to prevent boiling water from splashing out of the pot. Place a rack in the bottom to elevate the jars up away from direct heat, so they won’t break, and process in several batches if necessary.
Steps for Making and Canning Cherry Jam
If you are new to canning or haven’t canned in a while, it may be helpful to review this article on water bath canning at the National Center for Home Food Preservation website.
A more detailed printable recipe can be found at the bottom of this article, but these are the general steps for making and canning low sugar cherry jam with Pomona’s Universal Pectin:
Step 1: Gather Your Equipment
- Water Bath Canner or large pot with a rack
- Cherry pitter
- Potato masher
- 5 half-pint canning jars
- Lids and bands (new lids for each jar, bands can be reused)
- Canning tools: lid lifter, jar lifter, canning ladle, funnel, and bubble popper
- 4 ounce jar with a lid for the calcium water mixture
- Plus basic kitchen tools such as a large sauce pan, small pot, bowl, towels, potato masher, and measuring cup.
Step 2: Combine the Calcium Water
Prepare your calcium water by mixing 1/2 teaspoon calcium powder (from the small packet in the Pomona’s pectin box) with 1/2 cup water in a clean jar with a lid. Shake well. You will only need 3 teaspoons for this recipe. Store the extra in the refrigerator for other canning sessions.
Step 3: Prepare the Canning Equipment
Wash your jars, lids, bands, and canning tools in warm, soapy water. Rinse well, and set aside to air dry until you are ready to use them.
Jars must be heated before filling to prevent breakage due to thermal shock. Place the jar rack into the water bath canner, set the jars upright on the rack, and add water to fill the pot covering the jars. Bring the canner to a simmer (180˚F) for 10 minutes, and keep the jars hot until you are ready to fill them.
Step 4: Make the Cherry Jam
Add the sugar and Pomona pectin powder to a small bowl and stir to combine. Set the sugar mixture aside.
Wash the cherries, stem, and pit. Pitting cherries can be messy. Get yourself a cherry pitter to make removing the pits easier.
Add the prepared cherries and water to a large saucepan over low heat until the cherries soften and release their liquid, about 5 minutes. Crush gently with a potato masher. Add the lemon juice, calcium water, and stir to combine.
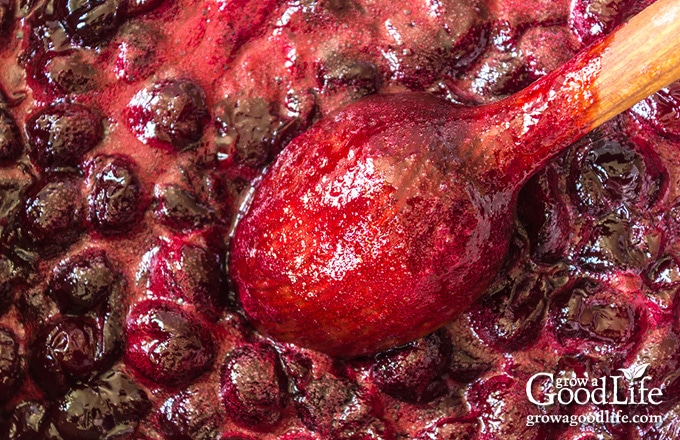
Bring the cherry mixture to a boil over medium-high heat. Add the sugar mixture and stir to dissolve. Continue stirring until the jam comes back to a full boil and begins to thicken, about 2-3 minutes. Once it boils, remove from heat.
Step 5: Can the Cherry Jam
Spread a kitchen towel on the counter. Use the jar lifter to remove a jar from the canner, drain, and place on the towel. Keep the remaining jars in the canner so they stay hot.
With the canning funnel and ladle, add cherry jam to the jar leaving 1/4-inch headspace. Run the bubble popper through the jar to release any trapped air bubbles. Wipe the rim with a damp towel to remove any residue. Center a lid on the jar, place the band over the lid, and screw it on until fingertip tight.
Place the jar back into the canner, and repeat with the rest of the jars. Process the jars in a water bath canner for the times indicated in the recipe below. Let the jars cool, test the seals, label and date the jars, and store the cherry jam in a cool, dark location.

Low Sugar Cherry Jam Recipe
Ingredients
- 2 pounds sweet cherries
- 1/4 cup water
- 1/4 cup lemon juice (juice from one lemon)
- 1 cup cane sugar
- 3 teaspoons calcium water from the Pomona's box
- 4 teaspoons Pomona's Universal Pectin from the Pomona's box
Instructions
Prepare the Canning Equipment
- Wash your jars, lids, and canning tools in hot soapy water. Rinse thoroughly to remove all suds. Set aside to air dry on a clean kitchen towel.
- Place the jar rack into water bath canner, set the jars on the rack, and add water to cover the jars.
- Bring the canner to a simmer (180˚F) for 10 minutes, and keep the jars hot until you are ready to fill them.
Make the Cherry Jam
- Prepare the calcium water by combining 1/2 teaspoon calcium powder (from the small packet in the Pomona's pectin box) with 1/2 cup water in a jar with a lid. Shake well and set aside. You will only need 3 teaspoons for this recipe. Store extra in the refrigerator for other jelly making sessions.
- In a small bowl, add sugar, Pomona pectin powder, and stir to blend together. Set aside.
- Wash the cherries well under clean running water. Remove the stems and pits.
- Add the prepared cherries and water to a large saucepan. Simmer on low heat until the cherries soften and release their liquid, about 5 minutes. Crush gently with a potato masher or the back of a large spoon.
- Add lemon juice, calcium water, and stir to combine. Bring the fruit mixture to a boil over medium-high heat.
- Add the pectin-sugar mixture and stir to dissolve. Continue stirring until the jam comes back to a full boil and begins to thicken, about 2-3 minutes. Once it boils, remove from heat.
Can the Cherry Jam
- Spread a kitchen towel on the counter. Use your jar lifter to remove a jar from the canner, drain, and place on the towel. Keep the remaining jars in the canner so they stay hot.
- Use your canning ladle and funnel and add the hot cherry jam to the warm jars leaving 1/4-inch headspace.
- Swirl the bubble popper through the jars to release air bubbles. Wipe the rim of each jar with a damp towel.
- Center a lid on the jar, and screw on the band until it is fingertip tight.
- Use the jar lifter to place the jar back into the canner, and repeat with the remaining jars. Try to leave some space in between the jars.
- Once all the jars are in canner, adjust the water level to two inches above the jar tops.
- Cover the canner and bring to boil over high heat. Once water boils vigorously, continue boiling for 10 minutes at altitudes of less than 6,000 ft. (adjust processing time for your altitude if necessary – see notes below).
- When processing time is complete, turn off heat and allow the canner to cool down and settle for about 5 minutes.
- Spread a kitchen towel on the counter, and remove the cover by tilting lid away from you so that steam does not burn your face.
- Use the jar lifter to transfer the jars from the canner to the towel.
- Don't tighten bands or check the seals yet. Let the jars sit undisturbed for 12 to 24-hours to cool.
- After the jars cool for at least 12 hours, check to be sure jar lids have sealed by pushing on the center of the lid. The lid should not pop up. If the lid flexes up and down, it did not seal. Refrigerate the jar and use up within a few weeks.
- Remove the screw on bands and wash the jars. Label, date, and store your jars in a cool, dark place. Use within 12 to 18 months. Refrigerate the jam once opened and consume within 3 weeks. Yields about 4 half-pint jars.
Notes
Nutrition
If you love cherries, you may also like these cherry recipes:
- Bourbon Cherries Canning Recipe
- Cherry Sweet and Sour Sauce
- Homemade Cherry Barbecue Sauce
- Cherry Sweet and Sour Chicken Stir fry
You May Also Like These Preserving Posts:
- Honey Sweetened Concord Grape Jelly
- Homemade Crabapple Jelly with No Added Pectin
- Small Batch Chokecherry Jelly
- Spiced Apple Jelly with No Added Pectin
Good planning is key to a successful vegetable garden
Whether you are new to growing your own food or have been growing a vegetable garden for years, you will benefit from some planning each year. You will find everything you need to organize and plan your vegetable garden in my PDF eBook, Grow a Good Life Guide to Planning Your Vegetable Garden.

I just finished making two batches of this. I’m a fan of the Pamona’s pectin and the ability to keep things low in sugar. Based on my taste test of the hot jam, it’s outstanding. I have one question. After pitting and stemming my cherries I chopped them. I’m not a fan of chunks in jam. I also mashed the fruit with a potato masher as the directions say. It appears that the chunks of fruit in the jars have floated to the top. Any idea why and what should do in the future to prevent this?
Darryl, It’s great to hear that the taste test turned out outstanding! Regarding the chunks of fruit floating to the top of the jars, what you are experiencing is known as “fruit float.” This can happen when the jars are very hot and the jam hasn’t fully jelled yet. The pulp, which is lighter and contains more air than the juice, tends to rise to the top during this stage. While it’s understandable that you prefer a smoother consistency without visible fruit chunks, fruit float can occur with certain fruits. To minimize this, you can try simmering the fruit over low heat a little longer after crushing to try to drive more air out of the fruit.
If you notice fruit float after the jars have been processed and while they are cooling, there’s a simple method you can use to redistribute the pulp before the jam gels. After about an hour of cooling and after the lids have sealed, check the jars. If you see any fruit float, gently turn the jars upside down to encourage the pulp to redistribute throughout the jar. After approximately 45 minutes, you can turn the jars right side up again. Repeat this process if needed until there’s no distinct dividing line between the fruit and juice. This technique helps maintain an even distribution and prevent a noticeable separation when the jam finally sets.
If your jam has already gelled with visible fruit chunks at the top, you can gently stir the pulp and juice back together when you open the jar to enjoy it. Separated jam in properly sealed jars can still be stored safely. I hope these suggestions help.